Cued data acquisition and processing
-
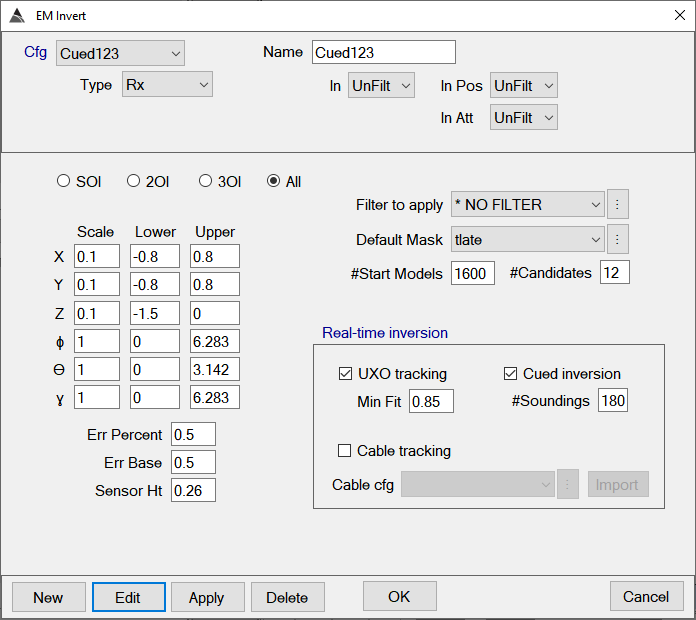
BTField will now collect data in cued mode if the Inversion configuration is set as shown here in this example cfg named Cued123,
-
If we look at this Cued123 example, we see the UXO tracking and Cued inversion boxes are checked and the #Soundings is set to 180, which is typical for cued acquisition. Once consumed, BTField will invert the average of these 180 soundings. Note that the In parameter is set to UnFilt because detrending is not performed for cued surveys – instead, a background measurement is simply subtracted before the inversion is run:
-
Also note in this Cued123 example, the new All radio button option is selected. The All option will perform the SOI, 2OI, and 3OI inversions all at once. Therefore, when taking a cued shot, all three of these inversions will be performed immediately after the 180 soundings have been consumed.
-
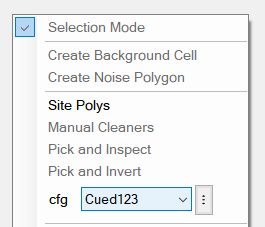
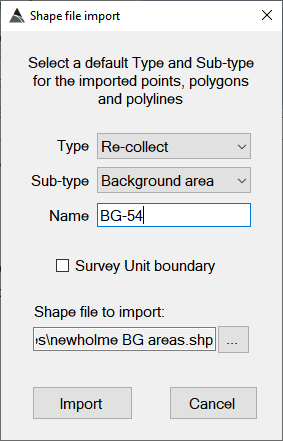
To help ensure proper background measurements, the operator can import a shape file containing the polygons defining the acceptable areas for acquiring a background. This can be done using the shape file import feature in the Site Poly interface. When importing, set the Type to Re-collect, and Sub-type to Background area as shown here:
-
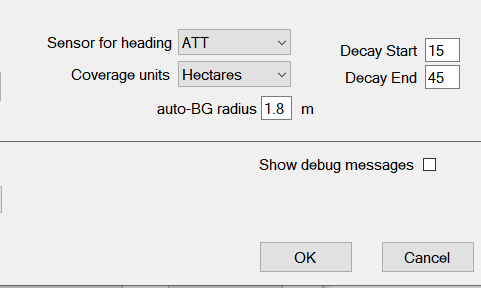
Before starting a cued survey, the operator should ensure the Sensor for heading is set to ATT in the Project Settings as shown here:
-
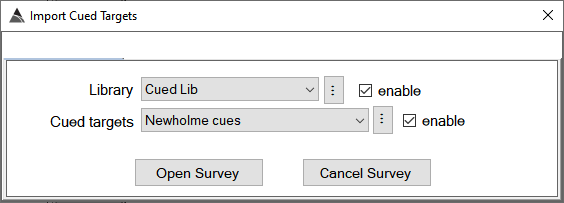
To begin the cued survey, click the OPEN button as usual, then select the survey type, and click OK. You will see the following interface that allows you to set your library and also import your cued targets:
-
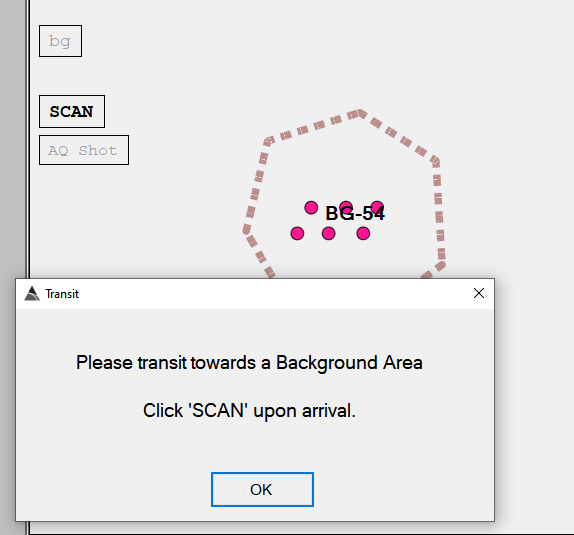
BTField will first ask the operator to navigate toward a BG area and click the SCAN button, which will auto-turn on the transmitter and begin scanning the area:
-
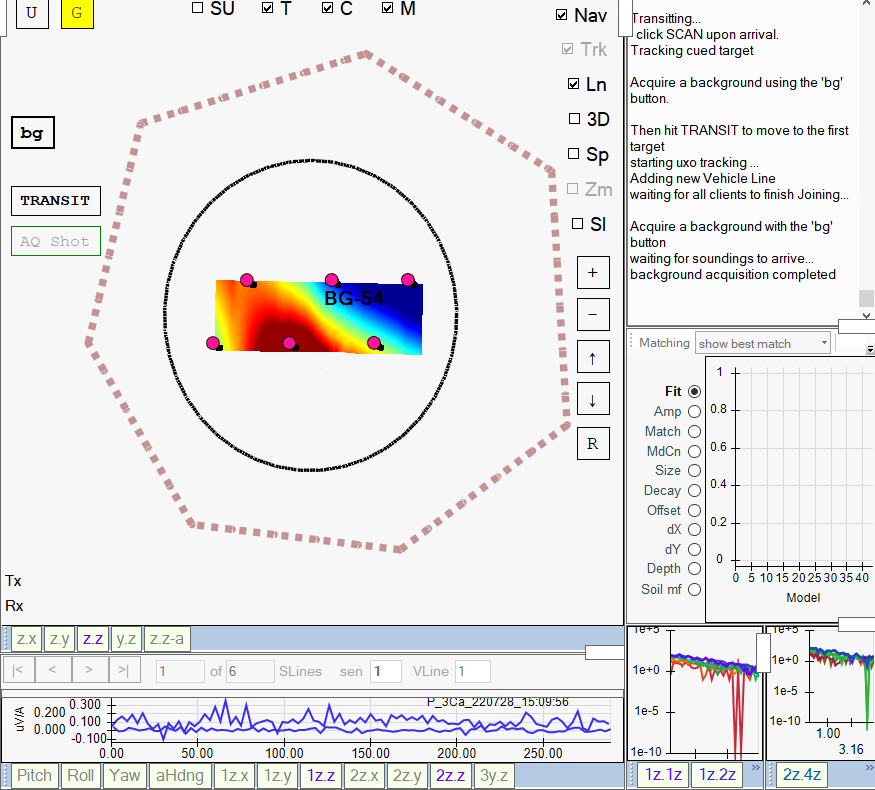
Once the scan has started, the real-time grid will appear and the bg button can be pressed to start acquiring the background. In the screenshot below, the bg button has been pressed, and the background acquisition has just completed. After the background acquisition has completed, the operator can click on the TRANSIT button to auto-turn off the transmitter and proceed to the next cued target location.
Here is an example of what it would look like while transiting away from the background location, and toward the next cued target #3800. The grid view will auto-zoom in as the platform approaches the target.

-
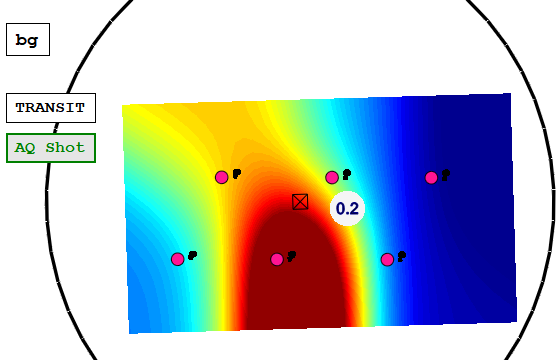
Once a cued target location is reached, the operator can hit the SCAN button to auto-turn on the transmitter and start the real-time uxo-tracking. In this screenshot, the operator has just started the scan and an anomaly is being tracked at a depth of 0.2 m, as indicated within the white tracking dot.
-
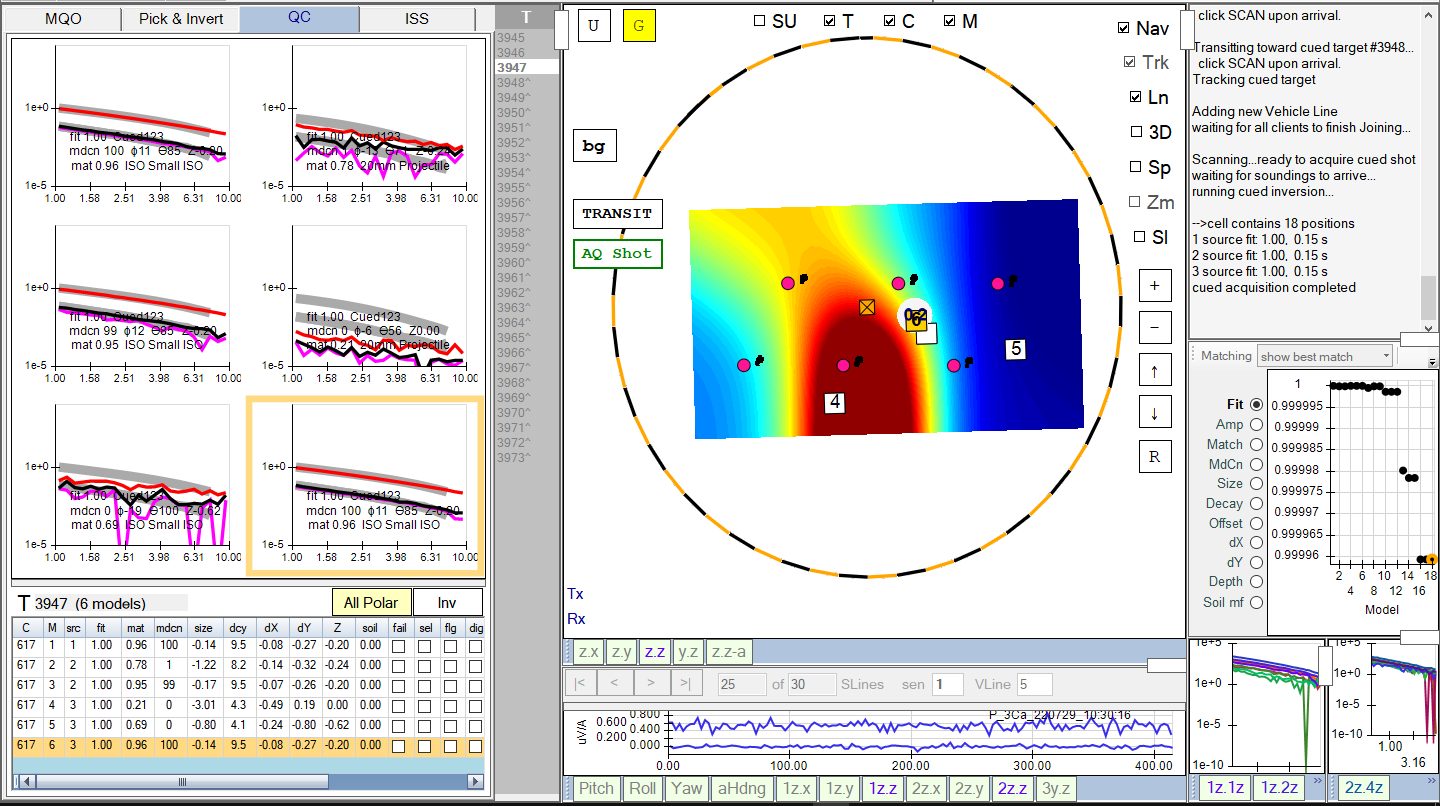
During the scan, the operator can take a cued shot at any time using the green AQ Shot button. The inversions are run immediately after all 180 soundings have arrived, and the results are presented as shown here. In this example, the best fit locations are very near the white tracking dot:
-
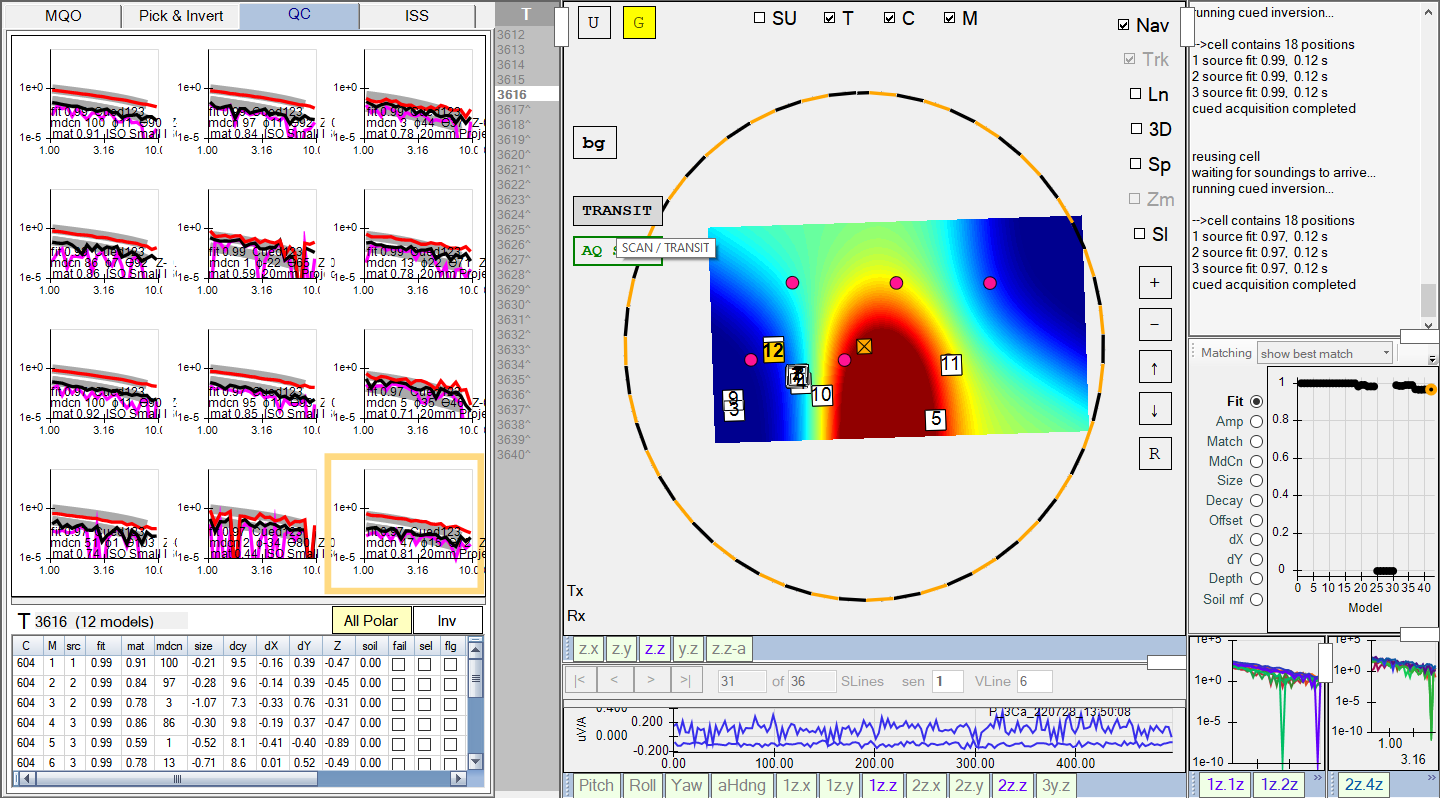
It is also possible to take multiple cued shots (i.e., click on the AQ Shot button again). Here is an example of the operator taking 2 cued shots for target #3616:
-
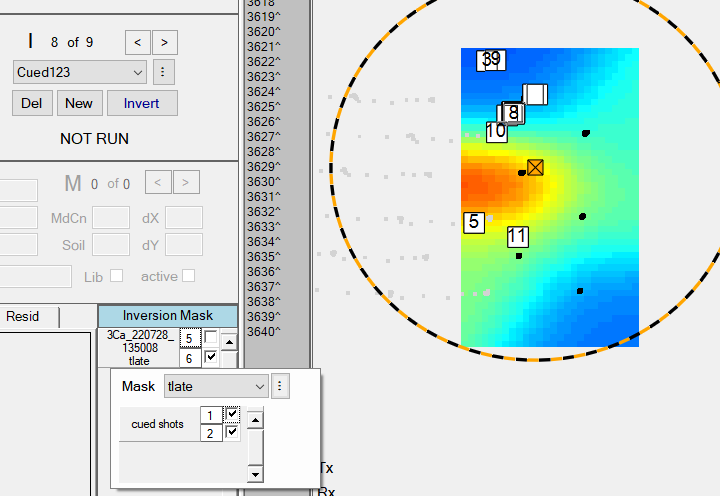
Additional inversions run in post-processing will have the option of selecting any combination of the cued shots for inversion via a right-click on the inversion mask. In this example, both shots 1 and 2 are selected for inversion, as shown here: